Last week, I bought the Anet A8 printer for the low low price of £114 GBP. I believe it has brought the cost of 3D printing so low that every true hobbyist now owes it to themselves to look into owning one. During the process of building and customising our A8, we took a ton of notes in the hopes that it might prove useful to others. In this article, we’re dumping our build guide, set-up guide and upgrade guide in massive write-up. For those of you who recently purchased an Anet A8, we hope this helps you get started!
Anet A8 Build Log with Pictures
The printer came with a digital manual that can be accessed on the SD card that comes packaged with it. I was actually pretty impressed with the quality of the manual. Much like the manuals you get from Ikea, it expressed the entire process pictorially and I generally found it pretty easy to follow. It was, however, missing a section and really needed some extra pictures at certain points. To alleviate this, I used a video released by the Anet team in tandem with the written instructions. Here is part 1 of that video:
I took pictures of the process of building my Anet A8, which you can find by expanding the section below this paragraph. I want to note that this was my first 3D printer build and I screwed up in a few places (which I have documented). I would not use the pictures below as your sole source of information for building this printer.
Click here to view my complete build log
Setting up your Anet A8 for the First Print
The instructions terminate with a completed printer, but do not provide any guidance on how to do the first time set-up so that you can do your first print. I find this pretty unforgiveable – at this point you still have a considerable amount of set-up work to do! Anet provides a pretty handy “debugging” video which covers most of these steps, which you can find here:
I’ll also write out exactly what I did after building my printer:
Bed Covering Material
The printer bed of the A8 comes from the factory with a brown masking tape covering it. This isn’t just for shipping – Anet intends for you to print on top of this! In fact, painters tape is one of the better beginners bed printing materials. Hopefully you, unlike me, did not remove this tape.. Another material you can use is called Kapton tape, which is a tape which remains sticky in a wide range of temperatures. This will provide an arguably better printing surface. Luckily for me, I had some Kapton tape which we have used with our Lulzbot lying around so I put it on my Anet A8’s print bed.
The best solution for bed covering material is to buy a small block of glass to seat on top of the bed. This is discussed later.
Whatever bed material you use, make sure you get it sorted out and applied before you continue on to the next steps. Anytime the material is changed, you’ll need to re-level the bed at least.
Aligning the Z-Axis Rods
Finer alignment of the Z-Axis rods should be completed first. The Z axis motors should always move together and keep this alignment, so you basically set it now and check after every few hours of use. Misalignment here can cause the same symptoms as an unleveled bed. Furthermore, any time this is messed with, you’ll need to re-level your bed (and possibly set the z-axis limit switch).
Setting the Z-Axis Limit Switch
The limit switches are used to tell your printer where its “home” is. This location is then used as a relative point from which all the rest of your printing begins. Of all the limit switches, the Z-axis (vertical motor) limit switch is the most important. It is used to tell your printer where the point is where the extruder head is just slightly over the bed.
This limit switch will need to be adjusted. To perform this adjustment:
- Power up your printer and access the main menu.
- Go to Quick Settings->Home All. The printer head should move to all the limit switches.
- Disable the motors by going to Quick Settings->Disable Stepper Motor.
- Move the printer head X-axis and printer bed Y-axis so that the head is over the bed.
- Measure the distance between the tip of the extruder and the bed.
- Subtract 2mm from that distance and lower the Z-axis limit switch down that amount.
- Repeat step (2) to re-center everything against the limit switches.
- Repeat step (3) and check the extruder head. It should now be within 2mm of the bed, but not touching it.
- Continue to leveling the bed.
Leveling the Bed
Leveling your bed is probably most important calibration you can do. The procedure configures your printer so that your extruder tip is a set distance from the bed at all points across the bed. This allows the printer to accurately print the base layer of plastic which forms the foundation for everything you print.
Leveling the bed on the A8 should be accomplished at first set-up, every 5 or so prints after that, and anytime you move the printer or otherwise adjust it. In most cases, the process should only take about 5 minutes, so don’t worry about it too much.
If your prints are having problems where the base layer is not adhering to the bed properly – particularly if it is just one area of the bed that is having this problem – bed leveling is very likely to be the problem.
- Power up your printer and access the main menu.
- Heat the bed and extruder to PLA settings by going to Quick Settings->Preheat PLA. Do not touch the extruder tip after completing this step! It will be extremely hot. The bed will also be hot, but touchable.
- Go to Quick Settings->Home All. The printer head should move to all the limit switches.
- Disable the motors by going to Quick Settings->Disable Stepper Motor.
- Move the printer head along the X-axis and bed along the Y-axis so that it is over the close-left corner of the bed relative to you.
- Adjust the printer bed screw until you can just fit a piece of card stock paper (measuring .2mm in width) between the bed and the extruder tip. You want the tip to be hitting the cardstock but not pressing it into the bed. You can test this by moving the head with the card under the tip. If the card moves with the head, that’s great. You don’t want it to be hard to move or for it to make scratching noises while it drags on the paper though. You should be able to insert and remove the card easily.
- Repeat (4) and (5) for the other 3 corners of the printer bed.
- Repeat the whole process again, noting any errors.
- If any adjustments were made in step (7), repeat the process again. Keep repeating it until you check all four corners with no errors found at all.
- Screw on and tighten the wing nuts which secure the bed leveling mechanism.
- Repeat the leveling process one more time – sometimes the wing nuts can throw it off.
Your First Print
With the bed leveled, you’re ready to attempt your first 3D print. Before you do that, though, you need to understand the different types of printer input files and how to generate them.
STL
A 3D print generally starts with an STL file. This type of file describes a 3D part as a set of triangles is generated from a CAD modeling program like Sketchup, Blender, Solidworks, etc. These are also the types of files you download from online open-source 3D printing sites like Thingiverse, Yeggi and others. To read more about how to find or create your own STL files, check out our article on using 3D printing for drones.
GCode
3D printers do not have the capability to print an STL file, however. As sophisticated as they might look, they are actually controlled by pretty dumb little computers. These computers can only follow a very basic set of commands – like “move X-axis motor left 1mm”, “extrude filament .5mm”, “turn extruder temperature to 210 degrees”, etc. These sorts of simple commands are exactly what make up “.gcode” files.
An important thing to know about gcode files is they are compiled for the printer. A gcode file built for our Lulzbot Mini, for example, should not be used with the Anet A8 built in this article. It may work – but more likely it’s just going to make a wasteful, dangerous mess of stringy plastic.
Slicers – Converting STL to GCode
“Slicer” programs fill in the important middle ground of converting STL files you can download from the internet into the gcode instructions your printer needs to build a model. The Anet A8 SD card comes with two slicer programs – “Cura” and “Repetier”. We are going to recommend you use Cura in this guide since we are more familiar with it (it is the slicer of choice for our other 3D printer).
Printing your first gcode
For people who have never done a 3D print in their lives, I recommend you start out by printing one of the pre-compiled gcode files that is on the SD card that came with your A8. There are several options you can choose from, it doesn’t matter which one you pick. The objective is to see if your printer is properly put together and can print out something basic that has already been designed for it.
The process of printing a gcode file is a few easy steps:
- Put the file on the root of your SD card.
- Insert the SD card into your Anet A8 printer.
- Access the main menu by pressing the center button and select “SD Card->Mount”.
- Access “Print File”.
- Select the gcode file you wish to print.
The extruder head and bed will begin heating up immediately. Once they are up to temperature, the printing process will begin. Watch it carefully for the first few minutes to ensure the first layer is properly laid down onto the bed and is sticking fine. If it is – you’re free to walk away. If not, you’re in for some troubleshooting.
Printing some STL files
This is the real reason you likely got a 3D printer – you wanted to turn some camera mounts or other quadcopter parts from STL files into real plastic bits you can actually use. In this section, I’m going to walk you through how I printed out my first few STL files on my Anet A8.
Cura
As mentioned above, I will be using Cura as my “slicer” – the program that will convert STL files to gcode files the printer can use. I recommend using Cura 14.07 with the Anet A8. It is almost a year old at this point, but I was able to get it working very quickly.
Version 14.07 of Cura should come on the SD card that comes with the printer. You can find it under “A8*\A8*\A8\Software\Cura 14.07”. You can also download versions of Cura here. We highly recommend you download Cura 14.07.
I briefly tried to get the latest version of Cura – 2.5.0 – working, but was unable to due to some printing problems with the settings I was using. I will continue to attempt to get this to work and will update this guide if I figured it out. Honestly, though, unless you are trying to do some pretty advanced prints, Cura 14.07 should be more than enough for your needs. I have yet to find a model it could not print.
Configuring your Printer in Cura
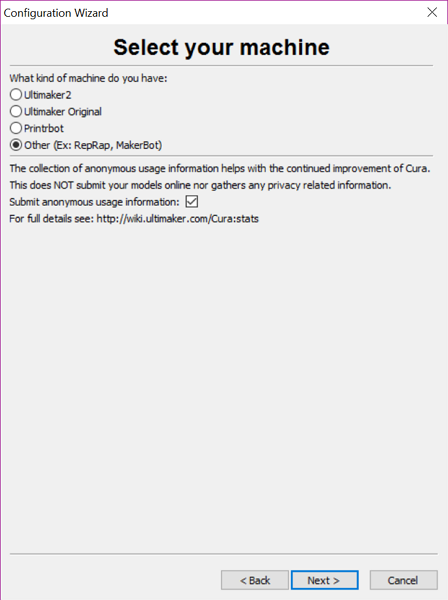
Configuration of Cura is pretty simple. When you first launch the application, you’ll be prompted with the “Machine Creation Wizard”. Click “Next” to access the first configuration page.
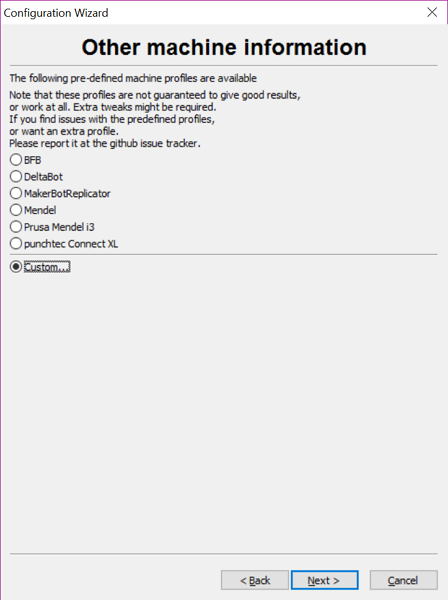
In the next step, select “Custom”.
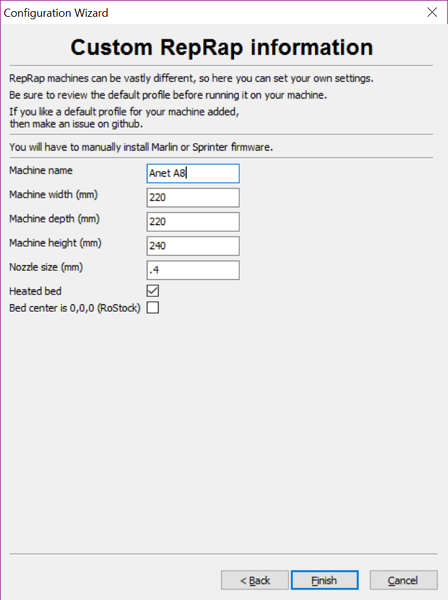
Finally, copy the settings seen in this screenshot on the next page:
With that completed, you’ve told Cura the hardware specs for your printer. You still need to configure it to tell it how to best print. I recommend doing this by loading a pre-programmed “profile” file from Anet. This profile can be found in the ini file on the SD card that comes with the printer (under “A8*\A8*\A8\Software\Cura 14.07”).
Once you have the file, load it into Cura by clicking File->Open Profile.
Generating your Gcode File
Now that Cura is set-up, you can start generating Gcode files that your Anet A8 can use to print objects. This process isn’t too difficult but has a small learning curve to it. To start “Load” an STL 3D model file into Cura using the button in the main window. Position the 3D object inside of the printing box where you want it. You can rotate, resize and move the object using tools which you can find in the main window of Cura. Once you’re done, you can create the GCODE file by clicking the “Toolpath to SD Card” button, which saves a GCODE file to an attached SD card.
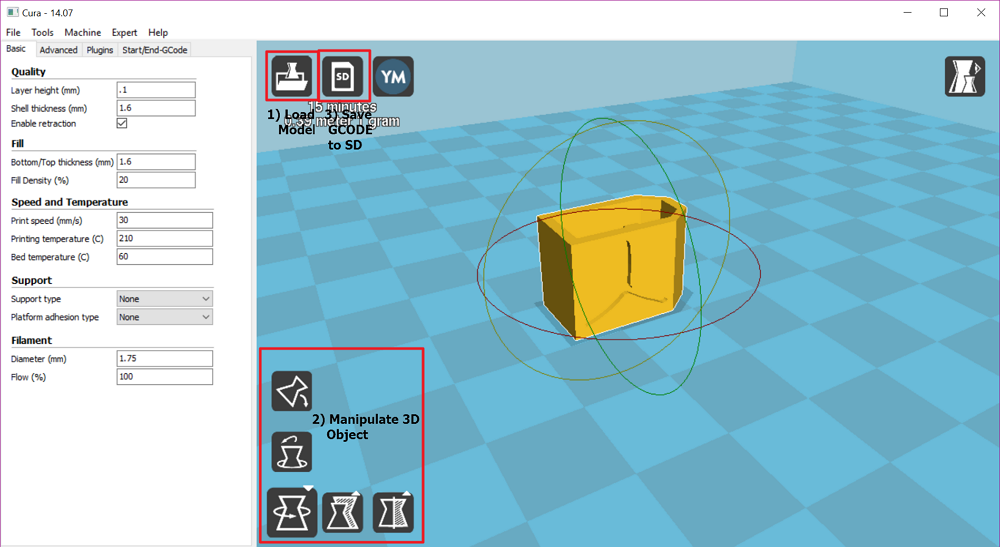
From here, the printing process is identical to the steps above “Printing your first GCODE file”. Plug your SD card into your printer and cross your fingers!
Anet A8 Upgrades
Purchased Upgrades
Mosfet Upgrade – Highly Recommended for Safety
The extruder and hotbed FET drivers are one of the big weak points of this printer. Left to their own devices, they will slowly melt the plastic connectors on the main board where you plug in the extruder / hotbed wires. A couple of people have even reported smoking boards. For this reason, I highly recommend bypassing these FETs by using a specialized expansion board. Luckily, these are pretty cheap and readily available. I picked mine up for $16 on Amazon.
The installation process is pretty simple and covered in this guide:
//3dprint.wiki/reprap/electronics/heatbed_mosfet
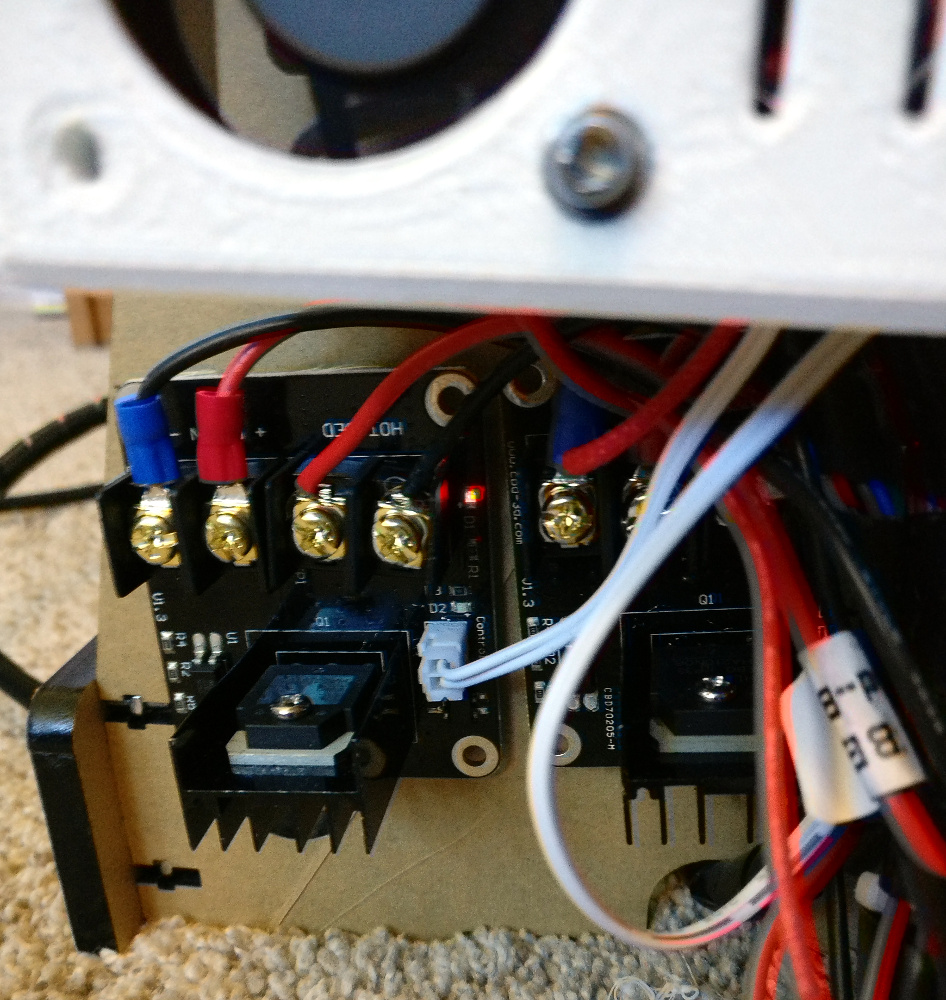
I did the mod on both my hotbed and extruder, though most people only suggest the hotbed. This removed all load from my Anet mainboard:
Borosilicate Glass Bed
The stock aluminum bed must be covered with painters tape or kapton tape to print well (or at all). This is a little frustrating to work with because it needs to be replaced regularly and it is extremely difficult to get it perfectly flat. The result is 3D prints that have imperfections on the bottom and issues with the first layer of the print.
The best workaround I’ve come across in the printing community is to use a glass sheet on your bed. You can have this sheet made by a local glass specialty store, or you can purchase one on Amazon. Living in a small community with no glass artisans, I opted for the latter. Unfortunately, Amazon only offers glass beds that are slightly smaller than the 220x220mm printing surface available on the A8. Here is the one I picked up: Signtek Heated Bed Glass Plate.
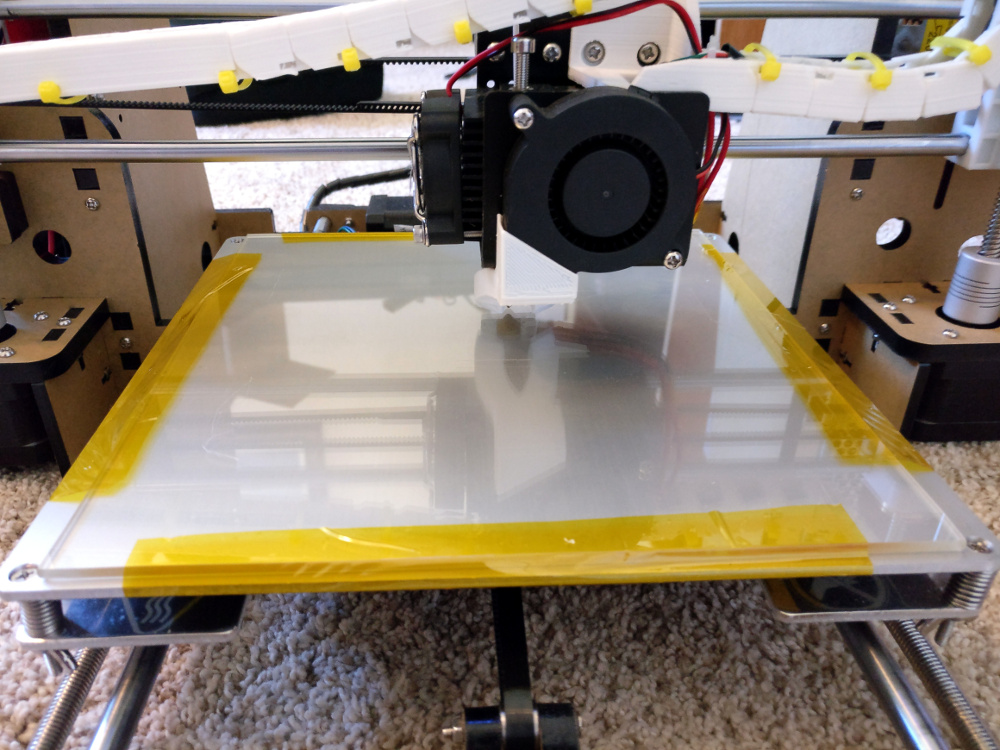
There are many ways to install a glass plate on the bed. I opted to just use Kapton tape to do it. Installation is relatively simple:
- Remove the heated bed.
- Place glass sheet in center of the bed plate.
- Use Kaptop tape to secure it.
- Screw heated bed back on.
- Re-level bed – always necessary!
Printed Upgrades
This might be the coolest thing about the Anet A8 for me – when you first build it, you have a low-end 3D printer, but you can actually upgrade it to a pretty decent machine by simply using it to print out upgrades for itself. I find the notion of the machine improving itself pretty pleasing. Maybe I’m just a little weird though. Anyhow, here are some of the upgrades I printed for my Anet A8 that I can recommend to anyone:
High-Efficiency Extruder Cooling Fan Duct
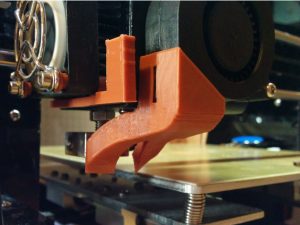
Upgrading the fan duct had an immediate improvement on the quality of my 3D prints. Had I known what I do now, it would have been one of my first prints. Unfortunately, it is a pretty challenging object to print (it requires supports, among other things). So – if you’re new to 3D printing, don’t try this as your first print! But try it soon.
Spool Holder and Top Mount
Getting my filament spool attached to my Anet A8 was a top priority. I didn’t like having to place it on top of a workbench or cabinet. While I was at it, I printed a proper spool adapter / holder, which was a massive print which took almost 16 hours! I recommend both – they really improved the ergonomics of the printer.
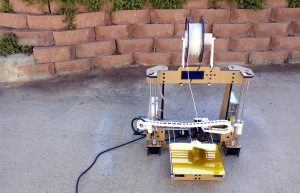
Spool mount for A8: //www.thingiverse.com/thing:2162266
Spool holder for A8: //www.thingiverse.com/thing:1624641
Extruder Harness Chain
This is a feature that came with the higher-end Lulzbot mini we own that I wanted on my A8. It confines the movement of the wiring harness for the extruder to simple push-pull motions and protects the wiring. It looks really snazzy once completed.
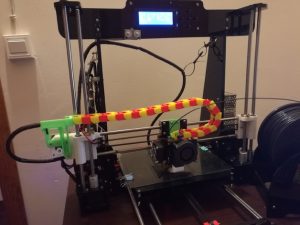
Extruder harness chain for A8: //www.thingiverse.com/thing:1872473
More..
These are just my favorite parts I gathered off of Thingiverse. There are hundreds of parts on that site though. Simply search “Anet A8” to see them.
